


Dreamwalk Corridor Guide

Main Story
Dreamwalk Corridor Quest Summary
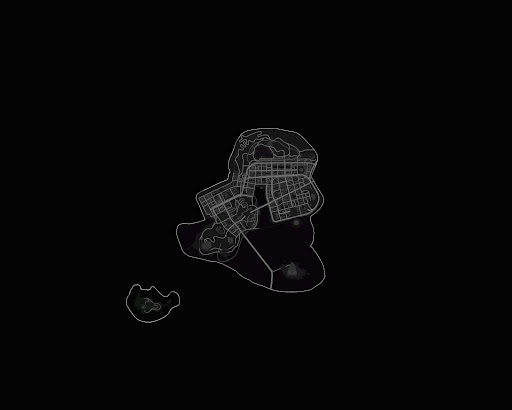
Nanally feels depressed after the events that happened involving Daffodil's betrayal. Tagedo suggests taking a vacation at Sunward Resort thanks to a ticket he got. They go to the resort which is a haven for anomalies and people. Nanally wants to take a home an anomaly but she can't due to her age; she meets a suspicious teddy bear who forges an agreement with her. Suddenly she disappears. You investigate the island and find that the bear was responsible for taking her to the Dreamwalk Corridor, a mysterious realm. After an ardous quest, you rescue Nanally and defeat a dreamwalker named Thyme. However, the Scarlet Letter retrieve an artifact belonging to Thyme raising more questions than answers.
Dreamwalk Corridor Walkthrough
Guide for Advanced Hunters: You must complete the quest "Debt Collector"
1st Main Objective: Visit Sunward Resort with Nanally
[1] Return to Eibon

Head to the 2nd Floor to where a dejected Nanally being comforted by Adler, Sakiri, and Edgar. Sakiri tells you that Nanally hasn't been happy eversince her master Daffodil got injured and disappeared.

Conveniently, Tagedo suggests to take a vacation at Sunward Resort with a ticket to boot.
[2] Proceed to the dockyard

Go to the dockyard by teleporting to the closest ReroRero telephone booth.
[3] Board the Ferry

Go to the ticket inspector who will check your ticket. After that, board the ferry.
[4] Talk to the Staff

When you disembark from the ferry, you meet Iroi who will be your caretaker for the duration of your tripe.
[5] Listen and Follow Iroi

Follow Iroi and Nanally until you reach the entrace of the resort
[6] Explore the Resort with Nanally and Iroi

Iroi will you give you a short tour around the resort while Nanally interacts with several anomalies along the way.
[7] Look for an anomaly that resonates with Nanally

After the tour, Nanally tells you that she wants to bring home an anomaly as a guarantor. Iroi tells you that her age prohibits her from being one. Nanally decides to convince the resort's investor Lady Inanna into keeping one. Follow Nanally until you reach Lady Inanna who is located a floor above.

Nanally tries to convince her into letting her bring one home but rules are rules. However, Lady Inanna provides an alternative: interact with the right anomaly and it may form a guarantor agreement with her. Follow Nanally around as she looks for an anomaly
| Anomaly | Location |
|---|---|
| RABBA RABBA |  |
| Fluffy |  |
| Pouch Mosquito |  |

Eventually Nanally comes upon strange creature that looks like a teddy bear. She immediately forms an agreement with it much to her delight. Nanally promises to return the next day but now it's time to head home.
[8] Return to Elbon

When you leave the dockyard you see Daffodil. Nanally tries to convince her to come back to Elbon but Poinsette interferes and tells her to come back with her to which Daffodil obliges. You and Nanally return to Elbon and tell Adler what happened. Sakiri then has a short argument with Nanally about the events that transpired.

When you try to knock on her door, she doesn't respond. Maybe she'll get better tomorrow.
[9] Take a look at Nanally

After resting, you check her room only to find her missing.
[10] Check out Nanally's room
| Item | Location |
|---|---|
| Memo Board |  |
| Bookshelf |  |
| Bedside |  |
After checking the items for clues, you decide to visit Blackbird. Maybe she can help you look for Nanally.
[11] Visit Blackbird

Blackbird cryptically gives you hints on where could Nanally be. You surmised that she could be somewhere in Sunward.
2nd Main Objective: Find and Rescue Nanally
[1] Return to Sunward

Head back to Sunward by using the ReroRero phone both within the island.
[2] Inquire the staff
| Staff | Location |
|---|---|
| Resort Staff #1 |  |
| Resort Staff #2 |  |
| Hidden Corner |  |

After checking out the spot that the bear should be, Edgar informs you that the anomaly encountered was a Teehee Bear: an anomaly that hates children who have slowly forgotten them over time.
[3] Head to the side gate

Make your way to the side gate and into the foggy forest. Follow the quest marker until you come across Teehee Bear who is on the beach.

After conversing with Teehee Bear, a boss fight will ensue.
[4] Defeat Teehee Bear

Teehee Bear is an agile boss so focus on dodging and countering. The boss is weak to incantation which in convenient since the team you have is composed of Adler, Sakiri, and Edgar. Be careful because once the boss's HP reaches a certain threshold, you cannot swap to your other companions.
[5] Go the mysterious woman

After defeating Teehee Bear, you'll be transported to another realm called the Dreamwalk Corridor. This is the place where Nanally was lured into by Teehee Bear. When you arrive on shore, you find a mysterious woman named Thyme. She warns you to leave but you resolve to rescue Nanally.
3rd Main Objective: Investigate the Dreamwalk Corridor
[1] Find clues on Nanally's disappearance

Follow the quest marker until you see a porthole. Head inside where you'll be transported to a concert hall.

Head left where you'll see a door. Open the door where you'll then go to a hospital.

Make your way to the end of the hall and you'll be teleported to another area.

Keep chasing the Nana Tiger until you head back to the Dreamwalk Corridor.
[2] Look for Nana Tiger

Keep chasing Nana Tiger by following the marker.
[3] Inspect the stele

Inspect the stele mark. It gives you information on the Elden Ville: an ancient village that remained in secrecy until it was discovered and mayhem ensued.
[4] Enter Corridor Dream

Nana Tiger enters another porthole which will lead you to another area. In this area, Nana Tiger is located near the food truck. Give chase where it'll enter into another porthole.
[5] Keep looking for Nana Tiger

Once you exit, 3 anomalies will spawn. Defeat them and continue forward.
[6] Enter Corridor Dream

After defeating the anomalies, a short cutscene will play out. After the cutscene, enter into the corridor dream.
[7] Follow the Girl

You arrive in another area. Talk to the little girl ahead of you. The girl tells you that she can help you look for Nana Tiger. Follow her to continue the quest.

You'll notice that there are transparent illusions to which the girl gives you a Kaleidoscope that you can use to interact with them. After using it, the pristine water is actually mud and the house that you'll enter into has been shown.

Keep following the girl until you arrive at the front yard. Use the kaleidoscope. The girl tells you that they're going to a different path.

Follow the girl until she leads you to a window. Use the kaleidoscope where you'll then enter the house.
[8] Continue following the girl
The girl will lead you to different areas around the house. Keep following her to proceed with the quest.
| Area | Image |
|---|---|
| Restaurant |  |
| Living Room |  |
| Storage |  |
| Aisle |  |
| Bathroom |  |

After emerging from the bathroom, keep following the girl. She'll stop and tell you to use the kaleidoscope on an open area. It turns out the sky is littered with eyes and is constantly tracking you.

After the cutscene, the girl will lead you to a room with a ladder.

Climb the ladder until you see a book shelf. Use the kaleidoscope on it. The bookshelf will turn into an elevator that you can use. Wait for the elevator to go down then exit.
[9] Look for Nana Tiger

Nana Tiger can be seen sleeping on a rock. Another cutscene will play out after which a porthole will open. Enter the porthole to proceed to the next objective.

4th Main Objective: Escape the Dream Corridor
[1] Investigate the Bedroom

When you arrive at the bedroom. Investigate the nearby sketchbook.

A small minigame will play out. You can choose to skip this option if you want.
[2] Check on Nanally

After the minigame, check on Nanally.

Another minigame will begin afterwards.

Once that's done, interact with the sleeping Nanally. You need to enter her dream using the sketchbooks which will pop up after the dialogue.

The final minigame will play.

After the minigame, 3 anomalies will spawn. Defeat them to progress through the story.

[3] Bring out the Real Nanally

Talk to Boss Tiger first before bringing out the real Nanally. To bring her out, talk to the one under the spotlight.
[4] Escape with Nanally

Hold hands with Nanally and guide her out of the dream. Keep following the quest marker until a cutscene will play. As you're about to leave Thyme tries to intervene. She tries to bargain that you can leave with the other Nanally but leave the real one behind in a place where she doesn't need to suffer. You refuse saying that she deserves to be back with her friends. Seeing no other choice, she prepares to fight.
5th Main Objective: Defeat Thyme

Thyme's boss fight has two phases:
- Phase 1: Corridor Projection

Reflect the energy attacks by attacking or doing a critical dodge. Once the ultimate is full, use it to deal massive damage.

You can also gather the energy blocks left behind to charge your ultimate.

One of her attacks involves slamming two crystals. Break them to stop the Corridor Projection from absorbing energy.
Repeat the process until you reach the second phase.
- Phase 2: Thyme

Thyme uses a lot of strings and setups so don't be reckless. Be patient and time your parries.
| Attack | How to Counter |
|---|---|
| Fish |  Wait for the circle, then do a critical parry. Wait for the circle, then do a critical parry. |
| Time Stop |  The telegraph to this attack is when a circle will form around you and you start moving slow. Dodge the two fishes coming towards you. The telegraph to this attack is when a circle will form around you and you start moving slow. Dodge the two fishes coming towards you. |
| Falling Stars |  Dodge the stars as they fall onto you. Dodge the stars as they fall onto you. |

After defeating Thyme, Daffodil, Poinsette, Zankou, and, to your surprise, Inanna, interfere and take the artifact from Thyme. It turns out that Inanna planned the whole thing just to take it.

You manage to escape but the experience has left Nanally in a coma. She's on her way to recovery but we won't know when she'll wake up.
Dreamwalk Corridor Reward
・Hunter Level EXP x 1000
・Annulith x 120
・Elite Hunter Guide x 30
・Fons x 100000
・Beetle Coin x 250000
・Chaotic Dye x 30