Fighting with a Dragon (Part 2) Guide

Main Story
Fighting with a Dragon (Part 2) Quest Summary
At the nightmare-plagued Amber Syrup Lake, a dream reveals Shinku's hidden self-doubt, and Mint rallies the party to protect her. After defeating the Scroll-Leaf Scorpion, a conversation with the Appraiser helps Shinku appreciate the life her powers have given her. The party then pushes into the Crimson Castle, where they recover the Dragon Armor. Despite warnings that it once corrupted its previous bearer, Shinku volunteers to wear it, gaining the Dragon Knight class. In the final battle, Shinku briefly succumbs to the armor's rage but is pulled back by her friends, and together they defeat the Crimson Dragon.
Fighting with a Dragon (Part 2) Walkthrough
4th Main Objective: Go to the Amber Syrup Lake
[1] Go to the Amber Syrup Lake

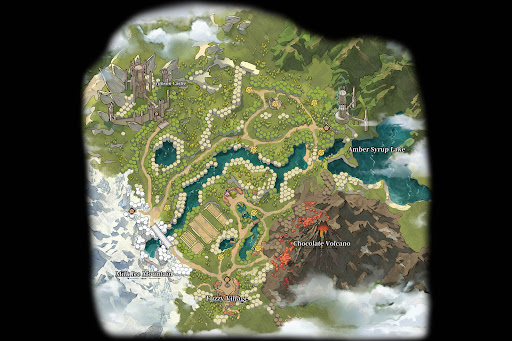
The Amber Syrup Lake is at the northeast of the map. Make sure to be at least level 25, and if you aren't yet, grind back at Milk Ice Mountain.
[2] Explore the Strange World

However, when you regain control, you won't be at the dungeon yet. There's not much to do here, so simply follow the waypoint.

It seems we're inside the dreams of Shinku. But it feels so lonely inside it.

Continue toward the objective marker.

It seems Shinku is hiding a part of herself from the others...

Approach the empty space to confront the other Shinku.

This angry Shinku says that the others will never accept her and that Shinku will never achieve anything as she is.

Before Shinku can sink into despair, Mint awakens her. It seems the aptly named Illusory Amber Syrup Lake gives nightmares to anyone who sleeps nearby. Sensing Shinku's distress, Mint rallies everyone to protect her.
[3] Explore Stillhaven Tableland

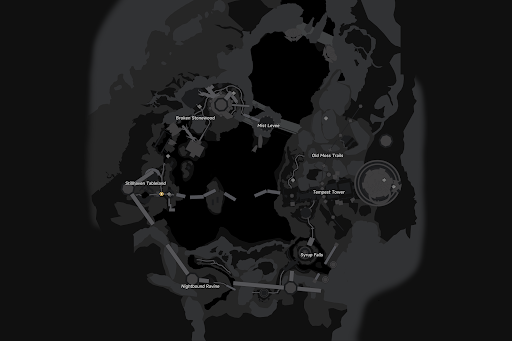
From the opening area, continue through the crossroads to reach the first bonfire. As always, use our Amber Syrup Lake map to locate any optional chests.

Return to the main path and continue forward.

The second bonfire is at the start of the swampland.

You can use any of the paths moving forward, as they all converge at the same small doorway.
[3] Explore Broken Stonewood

The third bonfire will be on the left side of the path.

Continue along the path until you reach the crossroads.
[4] Explore Mist Levee

The next bonfire is to the right, up on a staircase.

The main path continues to the left, going down a ridge.

Follow the path across the bridge. Once you reach the doorway, jump down to the area below.

Leave the area and follow the cave forward.
[5] Explore Old Moss Trails

At the end of the cave is another bonfire.

Head right into the open area. The stairs on the left lead up to the upper platform.

After entering the new area, you'll find the Mysterious Fuzzy Merchant, where you can buy and sell items. Nearby is a lost Fuzzy you can escort back to his camp. Since the camp also has a bonfire, helping him benefits both of you.

Midway through the trail is the Fuzzy's camp, with a bonfire beside it.

At the end of the trail, you'll find a Keeper Fuzzy. You have the opportunity to help him by protecting him from several waves of monsters.

Climb up the nearby staircases.

Right before a large doorway, there will be a path on the right you can take to fight a miniboss, a Scroll-Leak Scorpion. But this is not required, and you can skip it entirely.
[6] Explore the Tempest Tower

Follow the doorways leading into the Tempest Tower.

The first room you enter will be a great hall filled with monsters and treasures.

After clearing the hall, you'll reach another bonfire.

Climb the nearby stairs and enter the elevator.

At the top is another bonfire, along with the Mercenary Fuzzies.
[7] Defeat the Scroll-Leaf Scorpion

The Scroll-Leaf Scorpion is a higher-level version of the earlier miniboss, but the fight is largely the same. Despite the higher level, it's still one of the easier bosses. Here are some of its dangerous attacks.
| Attack | How to Dodge it |
|---|---|
| Claw Slash |  The Scroll-Leaf Scorpion slashes with its two claws. Dodge away to avoid it. The Scroll-Leaf Scorpion slashes with its two claws. Dodge away to avoid it. |
| Stinger Slam |  The Scroll-Leaf Scorpion slams down its stinger. Dodge to the side to avoid it. The Scroll-Leaf Scorpion slams down its stinger. Dodge to the side to avoid it. |
| Diving Attack | The Scroll-Leaf Scorpion dives into the ground similar to the Molten Dragon and jumps out. Dodge away to avoid it. |
[8] Go talk to the others

After defeating the Scroll-Leaf Scorpion, return to the camp.

Shinku shares with the Appraiser that her ability grants her great power, but also great destructive capability. She wants to help here, but as a villager, she has to watch in the sidelines. The Appraiser asks if she's ever thought of a life without powers. Shinku realizes that it's because of her ability that she's met everyone here. She thanks the Appraiser for his words that helped her realize what she has.
5th Main Objective: Go to the Crimson Castle
[1] Go to the Crimson Castle

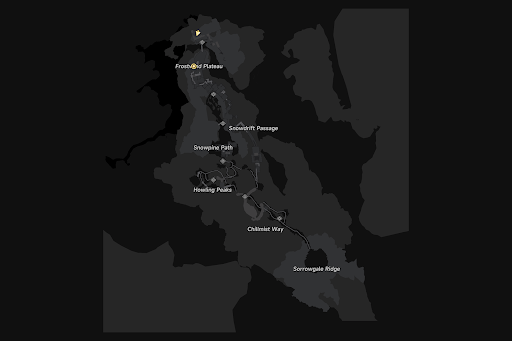
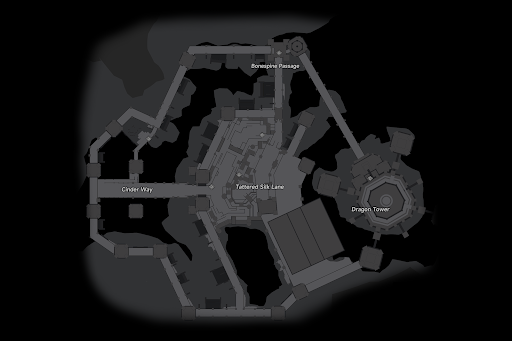
The Crimson Castle is in the northwest of the map and requires you to be at least Level 35. Grind at the Amber Syrup Lake if you aren't that level yet. Here's a map for the Crimson Castle can be used to check for chests!
[2] Explore the Crimson Way

Climb up the ramps to get to the first bonfire, as well as a look at the impressive castle.

Continue through the ramparts until you reach a room with an elevator.

Exit the elevator and climb the stairs. Continue along the ramparts until you reach the top.

These ramparts lead to the Castle Entrance, and are filled with monsters.

You'll also encounter a Level 35 Molten Dragon at the halfway point. As it's around the same level as you, it won't be much of a problem.

The second bonfire is just beyond the castle entrance.

You'll find a staircase just before the entrance to the next room. Climb it to the second floor.

Turn right and enter the inner area.
[3] Explore the Tattered Silk Lane

From this point, go towards the locked gate.

Before the locked gate, there is a corridor to the right that leads to the next bonfire.

In the next area, you'll fight a Level 35 Scroll-Leaf Scorpion miniboss.

After defeating the miniboss, follow the narrow hallways to an elevator room.

Follow the ramparts to the end.

The Mysterious Fuzzy Merchant will appear to give the Appraiser, Mint, and Iroi new equipment. However she warns of the danger of the Dragon Armor. It gives power, but will also try to control you.

Shinku volunteers to use the armor. The previous heroine disappeared because she let the Dragon Armor control her and she left her companions in shame. But Shinku won't let that happen to her.

Afterward, enter the room and take the elevator.
[4] Find the Severed Tail of the Golden Dragon

There will be a bonfire for you to use at the top of the elevator room.

Exit the room, follow the corridors, and climb the stairs. When you exit, you'll encounter a Level 35 Frostspike Dragon.

After defeating the Dragon, enter the next room to find another elevator.

When you ascend the stairs in this room, you'll encounter the Severed Tail of the Golden Dragon. It allows Shizuku to switch to the Dragon Knight class!

The Dragon Knight Class has extremely fast martial art attacks and can switch to strong fiery attacks when transformed. It also boosts Shinku's traversal, leting her run much faster and reach hard to reach places with higher jumps!
[5] Find the Crimson Dragon

There's one final Rampart for us to go through.

At the end is a big hall filled with monsters and chests. Be careful not to open chests not marked in the map, as they contain poison.

Enter the small corridor on the right to ride another elevator.

Another bonfire is located in a small outdoor area.

Defeat the monsters inside this hall and enter the last elevator.

The last bonfire will be at this elevator.

Head outside and climb the stairs to face the final boss!
[6] Defeat the Crimson Dragon

The Crimson Dragon taunts Shinku, saying she'll betray her friends. But Shinku won't let his words come true!

When the Dragon reaches half health, it almost seems like his words do come true. A cutscene will play of Shinku's rage being unleashed But Shinku accepts the darker side inside of her, and her friends are able to help her comes to her senses!
The Crimson Dragon has a few powerful moves to watch out for.
| Attack | How to Dodge |
|---|---|
| Flame Charge |  A strong charge that leaves fire in its wake. Wait for the circle, then do a critical parry. A strong charge that leaves fire in its wake. Wait for the circle, then do a critical parry. |
| Fire Breath |  A powerful flame attack that goes far. Dodge to the side! A powerful flame attack that goes far. Dodge to the side! |
| Meteor Fall |  The Crimson Dragon shoots fire at the sky. Watch the circles on the ground and dodge the meteors as they fully expand. The Crimson Dragon shoots fire at the sky. Watch the circles on the ground and dodge the meteors as they fully expand. |
| Fiery Explosion |  A desperation move the Crimson Dragon does when it is almost defeated. It creates a large shockwave first, then flies to the air and explodes. Jump the shockwave, and dodge behind cover when it explodes. A desperation move the Crimson Dragon does when it is almost defeated. It creates a large shockwave first, then flies to the air and explodes. Jump the shockwave, and dodge behind cover when it explodes. |

With the Dragon defeated, Shinku thanks her friends for trusting in her. Mint wants to celebrate their victory with the Fuzzies!
But afterwards, the Dice Lord ends the game immediately with credits and a short epilogue sequence.

Even with the adventure over, Mint invites everyone to play again! So even after she feeds the Appraiser some bad food, you can return to her apartment to play 999 Nights again. With this, you can now access Challenge difficulty for 999 Nights. Congratulations!
Fighting with a Dragon (Part 2) Reward
・Mind Shard - Zero
・Hunter Level EXP x 2000
・Annulith x 120
・Expansion Core x 20
・Elite Hunter Guide x 30
・Fons x 200000
・Beetle Coin x 500000
・Chaotic Dye x 30
・Hetrogeneous Unit x 50