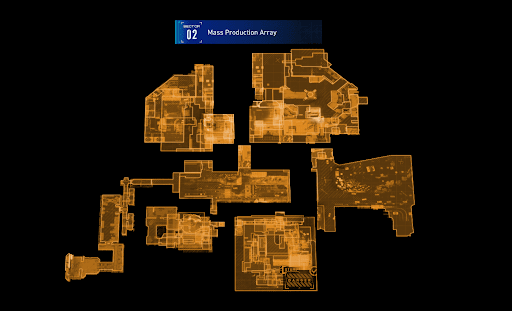
Sector 02: Mass Production Array - Shopping District Guide

Main Story
Sector 02: Mass Production Array - Shopping District Quest Summary
On to the next sector! Hugh and Diana must go through the Shopping District and reach the next beacon.
Sector 02: Mass Production Array - Shopping District Walkthrough
Starting Objective: Head to the MPA Comms Tower.
Return to the Shelter and resupply.

When ready, fast travel to Shopping District - Entrance.

Main Objective: Contact Earth from the Comms Tower.
AREA 02 - Shopping District

| Point of Interest | Details |
|---|---|
| Red Zone 1 |  Take the path next to the Escape Hatch and use Hugh's thrusters to jump over the parked vehicles.  The reward for clearing this Red Zone is a Pure Lunum. |
Follow the main path and grab the Riot Blaster.

Enemies will spawn from behind, go ahead and try out the new weapon on them.

After clearing the enemies, loot the area and enter the diner.

Grab the Red Gate Key from the counter.

| Point of Interest | Details |
|---|---|
| Upgrade Component 1 |  Hack the terminal to reach higher ground then hover towards the Upgrade Component. |
Get on top of the previous platform again and hover towards the next area.

Defeat the enemy guarding the door.

Continue forward until Hugh reaches some mannequins.

| Point of Interest | Details |
|---|---|
| Upgrade Component 2 |  Jump over and grab the Upgrade Component. |
Climb up right next to the mannequins and follow the path.


Continue forward and climb the platform behind the shelves.

| Point of Interest | Details |
|---|---|
| Safe Box 1 |  Defeat the enemies. Defeat the enemies. There's a Safe Box next to where the enemies came from. There's a Safe Box next to where the enemies came from. |
Head back to the shelves and exit left. There are platforms here to descend to.

| Point of Interest | Details |
|---|---|
| Upgrade Component 3 |  Right behind Hugh after dropping down to the first platform. |
Drop down to the bottom and defeat the enemies.

| Point of Interest | Details |
|---|---|
| Beacon 2 |  Hack the second Beacon to proceed. |
Enter the door and loot the area.

| Point of Interest | Details |
|---|---|
| New York, Back Then |  On a desk to the left. |
| Safe Box 2 |  In the same room, just by the stairs. |
| Pure Lunum |  There's also a Pure Lunum right next to the Safe Box. |
Head up the stairs and hack the door to proceed.

NOTE: Before going through the door, climb the two platforms next to it (left side) and inspect the peculiar wall.

| Point of Interest | Details |
|---|---|
| Lunar Hideout |  Grab the file on the desk. Grab the file on the desk. |
| Safe Box 3 |  Explore further and deal with the enemies. Explore further and deal with the enemies. Loot the Safe Box after clearing the area. Loot the Safe Box after clearing the area. |
Exit the Holo-Wall and enter the door Diana just hacked.
| Point of Interest | Details |
|---|---|
| Upgrade Component 4 |  Just jump up the crates to grab it. |
Keep moving forward until Hugh and Diana reach this mannequin.

| Point of Interest | Details |
|---|---|
| Upgrade Component 5 |  Jump over the obstacle to get to the other side.  The Upgrade Component is just up ahead. The Upgrade Component is just up ahead. |
| Safe Box 4 |  There's a Safe Box here but it's protected by traps.  Walk past it and jump up the platform. Hack the terminal to disable the trap. Walk past it and jump up the platform. Hack the terminal to disable the trap. |
| Basketball |  Just behind a shelf and some boxes. |
Keep exploring until Hugh reaches this room.

| Point of Interest | Details |
|---|---|
| Close Quarters |  Grab the Close Quarters Mod in the corner. |
| Urban Recreation Project |  There's also a file on the desk. |
Exit the room and hack the terminal outside to restore the bridge.

Cross the bridge and unlock the station.

Go back to the Shelter and resupply before proceeding to the Side Alley.
| Note |
|---|
| For a complete list of Collectibles in the Mass Production Array, use our Guide! |