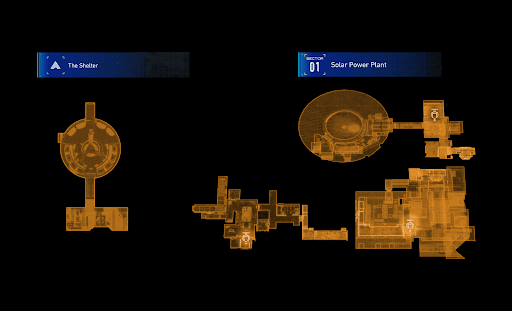
Sector 01: Solar Power Plant - Power Distribution Center Guide

Main Story
Sector 01: Solar Power Plant - Power Distribution Center Quest Summary
Hugh and Diana reach the Power Distribution Center after activating the backup generator. They proceed further into the second block of the Solar Power Plant to continue the mission.
Sector 01: Solar Power Plant - Power Distribution Center Walkthrough
Main Objective: Restore Power to the Lunar Base.
With the first area secured, Hugh and Diana proceed through the door toward the Power Distribution Center.

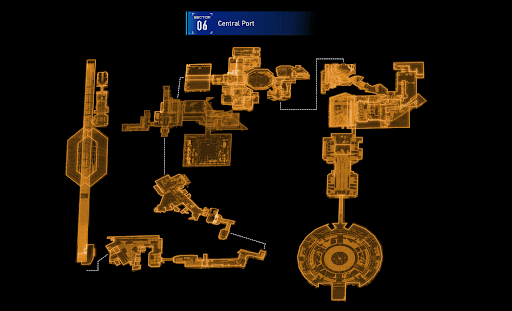
AREA 02 - Power Distribution Center
The two find the Escape Hatch: Sealed Sector Gate Station immediately after entering the room.
| Tutorial | Details |
|---|---|
| Escape Hatches |  This emergency exit allows travel to and from the Shelter. Be mindful that enemies respawn whenever players return to the Cradle. |
Returning to the Shelter allows Hugh and Diana to upgrade gear using the items they gathered so far.
| Point of Interest | Details |
|---|---|
| Mini Cabin Figures File |  A file that becomes available after heading back to the Shelter. |
Beyond the Escape Hatch, the path onward is filled with various laser traps and walls.

| Point of Interest | Details |
|---|---|
| Upgrade Component 1 |  While crossing through the moving laser, pick up the Upgrade Component. |
New Sub-Objective: Hack the Power Terminals.
Unlocking the door ahead requires finding five power terminals scattered throughout the area.

| Point of Interest | Details |
|---|---|
| Power Terminal 01 |  Found beside the Locked Door. |
Turn around and drop from the platform to find the second terminal.

| Point of Interest | Details |
|---|---|
| Shockwave Gun |  On the ground near the Power Terminal. An Attack Unit specializing in frontal suppression that fires powerful close-range shockwaves and makes enemies easier to stagger. It becomes less effective as distance increases. |
Once the Shockwave Gun is picked up, a Walker spawns. Great timing to test out this weapon!
A new enemy known as the Crusher appears next. These large opponents rely on stomp and jump attacks during combat.

| Point of Interest | Details |
|---|---|
| Power Terminal 02 |  When the enemies are defeated, hack the second terminal on the wall. |
Head over to the Elevator and use the panel to reach the upper level.

Jump onto the platform to find a Watcher and a Walker. Remember to use the Scan ability to make navigating to the next terminal easier.

| Point of Interest | Details |
|---|---|
| Power Terminal 03 |  Cross the orange pipes to hack the third terminal. |
Return to the center platform and proceed to the other side to find a terminal. A new weapon can be found by dropping down to the area below.

| Point of Interest | Details |
|---|---|
| Stasis Net |  A Tactical Unit that fires a spherical electromagnetic net. It expands on impact, immobilizing enemies within its radius for a short time. Duration varies by target. |
| Power Terminal 04 |  Located near the Statis Net Weapon. |
Next, head inside the yellow room on the left. A Crusher and a Walker emerge and lock the duo inside. Defeat them to deactivate Lockdown Mode.

| Point of Interest | Details |
|---|---|
| Power Terminal 05 |  Look up to find the remaining terminal! |
New Sub-Objective: Proceed to the Unlocked Door.
Hugh and Diana can return to the unlocked door now. Players may choose to progress immediately to the next block or explore the Power Distribution Center for additional items.

| Point of Interest | Details |
|---|---|
| Upgrade Component 2 |  Exit the yellow room for now to see a Filament Mass. This can be removed later on the game. For now, grab the Upgrade Component nearby. |
| Mini Cabin Buddy 1 |  There's also a hidden Mini Cabin Buddy here! Shooting one unlocks the Well Spotted! Trophy. |
| Laser Panel |  Turn around and pass through the yellow room again to head back to the area where the Stasis Net was found. Approach the edge to find a hackable panel. This device disables the laser traps encountered earlier. |
| Upgrade Component 3 |  With the right timing, the Upgrade Component located above the Laser Panel can be collected. |
| Upgrade Component 4 |  Jump to the next pillar and go down to find two Watchers and a Crusher enemy.  Take care of them first and hack the nearby panel to raise a platform and grab the Upgrade Component. |
| Safe Box 1 |  Climb the stairs near Upgrade Component 4 to reach a Safe Box at the end of the hall. |
| Upgrade Component 5 |  Players then should find their way back to the Elevator and jump on the side to get this. |
| Safe Box 2 |  One last tour! Ride the same Elevator again and drop down the ledge beside the Power Terminal 03. |
| Upgrade Component 6 |  Access the Panel near the Safe Box 2 to reach the upper level.  From there, hack the locked door to create a shortcut that leads back to the Escape Hatch. |
With these items finally collected, go through the unlocked door.

| Point of Interest | Details |
|---|---|
| Upgrade Component 7 |  Don't forget to grab this first before proceeding below! |

Heading down from this point allows Hugh and Diana to start their exploration of The Concourse.
| Note |
|---|
| For a complete list of Collectibles in Solar Power Plant, use our Guide! |