Prologue Guide

Prologue Quest Summary
As Hugh explores The Cradle with his team, a sudden moonquake separates him from the crew. He is saved by a mysterious little girl who can hack objects and enemies. Together, they head for the tram to escape.
Prologue Walkthrough
[1] Learn the Basic Movements.
The game starts by introducing Hugh and his teammates in outer space. After landing on the moon, Hugh notices that the grav-syncs aren't working, but they push forward.

Players get to know the basic controls once they arrive at The Cradle.

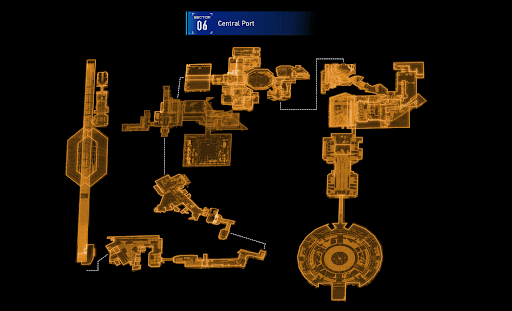
[2] Explore the Station.
Pass through the door and climb the stairs on the left to catch up with the other members.

Nicholas explains everything about the Lim Replicator—which Hugh calls a 3D printer.

Hugh continues to the next area, where he sees James on top of some boxes. James teaches him how to use a Thruster that boosts mobility.

Climb the cargo to reach the upper area, then use the boxes to cross over to James' location.

| Tutorial | Details | Item Description |
|---|---|---|
| Lunafilament |  Don't forget to grab the glowing blue items on the ground to get this material! | Refined from a mineral unique to the moon known as lunum, Lunafilament can absorb and copy any information it comes in contact with. Required for various upgrades in the Shelter. |
Next, follow James to the terminal up ahead. Continue walking with him until he notices the rubble blocking the way.

Captain James creates a Walker and orders it to clear a path so the group can access the Data Center.

They discuss a rumor that most people will soon be sent back to Earth and that it is best to leave everything to AI. However, they are taken aback when a sudden moonquake causes the room to fall apart, separating Hugh from the crew.

Hugh suffered severe damage from the fall. Luckily, a little blonde girl was able to integrate Lunafilament Nanoweaves into his gear.

[3] Fight Enemies.
Before Hugh can learn where the kid came from, IDUS, the autonomous base administrator, announces that an unregistered guest has entered the premises and instructs the Walker to "remove" them. This is where the combat tutorial starts!

| Tutorial | Details |
|---|---|
| Using Weapons |  Use your weapon (Primary Unit) to attack. Ammo will slowly recharge after use. |
It appears that Hugh's Grip Gun isn't enough to deal damage to the enemy. The little girl hops on Hugh's back and offers to help by hacking the Walker.
| Tutorial | Details |
|---|---|
| Hacking Enemies |  Reach the green EXE node to hack targets! Move the cursor across the hacking matrix and connect it to the EXE node to complete the hack, placing enemies in an OPEN state, making them vulnerable to gunfire. |
[4] Find a Way Out.
Despite being shocked that the child isn't human, Hugh prioritizes escaping the area for the moment. He receives a final order from Captain James to contact Earth before hearing a devastating attack over the comms.

Interact with the locked door to trigger a short guide on how to hack objects.
| Tutorial | Details |
|---|---|
| Hacking Objects |  Rotate and connect the circuits. |
Enter the next room, where Hugh can find a device that can restore suit integrity.
| Tutorial | Details |
|---|---|
| Repair Cartridge |  Rapidly repairs suit integrity and restores the wearer's HP. |
Keep heading forward until another moonquake aftershock hits. The girl will point out a nearby tram that can be their escape route.

[5] Reach the Tram.
Another set of Walkers ambushes the duo on their way. Just as before, make the enemy vulnerable by hacking them first before using the gun!

| Tutorial | Details |
|---|---|
| Effective Hacking |  Passing through more blue OPEN nodes enhances hacking, increases damage, and keeps enemies exposed for a longer duration. |
| Dodging & Thruster Gauge |  The Thruster is handy for dodging enemy attacks. Dodging and jumping consume the Thruster Gauge. When the gauge falls below a set level, these actions are disabled. |
Hack the objects that block the path and aim to head toward the tram.

The "bot kid" that carried the fight, as Hugh calls her, jumps off and enters the tram with him.

Hugh is able to activate Emergency Mode and reroute their destination to The Shelter for the next quest.