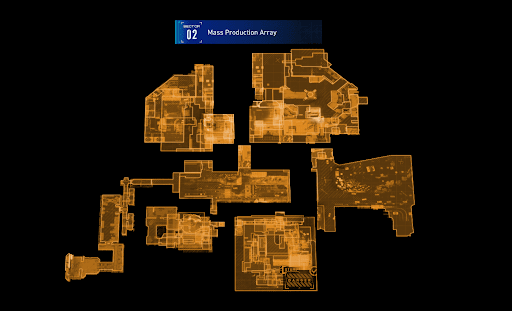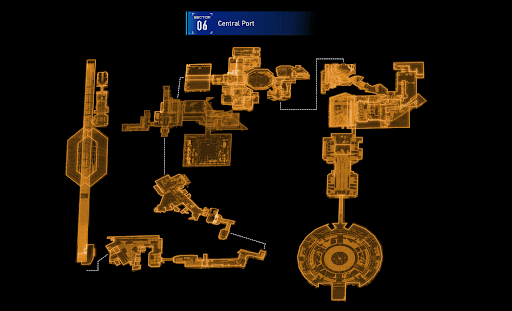


100% Mass Production Array Guide

Collectibles Guide
100% Mass Production Array Collectibles
Test Site Entrance
・Safe Box x 3
Shopping District
・Pure Lunum x 2
・Mod x 2
・Mini Cabin Buddy x 1
・Safe Box x 8
・Read Earth Memory x 1
Side Alley
・Mod x 2
・Read Earth Memory x 1
・Mini Cabin Buddy x 1
・Safe Box x 1
Business District
・Pure Lunum x 2
・Safe Box x 5
・Mod x 1
・Pure Lunum x 1
・Catridge Holder x 1
・Read Earth Memory x 1
Lim Recycling Facility
・Safe Box x 3
・Read Earth Memory x 1
・Mini Cabin Buddy x 1
100% Mass Production Array Collectible 1
Safe Box 1/3
AREA: Test Site Entrance
Note: This collectible can only be obtained after getting the Lim Eraser ability in Sector 2: Mass Production Array.

HOW TO GET
| Step | Image | How to get |
|---|---|---|
| 1 |  | Use the Lim Eraser ability to remove the filament masses at the diner. |
| 2 | | Enter the diner and you'll see the safe box immediately. |
100% Mass Production Array Collectible 2
Safe Box 2/3
AREA: Test Site Entrance
Note: This collectible can only be obtained after getting the Lim Eraser ability in Sector 2: Mass Production Array.

HOW TO GET
| Step | Image | How to get |
|---|---|---|
| 1 |  | Use the Lim Eraser ability to remove the filament masses at the shop, Nouvelle. |
| 2 | | Enter the shop and you can see the safe box immediately. |
100% Mass Production Array Collectible 3
Safe Box 3/3
AREA: Test Site Entrance
Note: After going to the Business District, you will go back to the Test Site Entrance to print a bridge.

HOW TO GET
| Step | Image | How to get |
|---|---|---|
| 1 |  | Print the bridge. |
| 2 |  | Use the printed bridge to jump and dash to get the safe box. |
100% Mass Production Array Collectible 4
Pure Lunum 1/2
AREA: Shopping District

HOW TO GET
| Step | Image | How to get |
|---|---|---|
| 1 |  | Get the Red Gate Key in the "Orbit of Our World" shop. |
| 2 |  | Enter the Red Zone near the Shopping District escape hatch and complete the challenge. |
| 3 |  | Open the chest to get the Pure Lunum as your reward. |
100% Mass Production Array Collectible 5
Mod 1/2
AREA: Shopping District

HOW TO GET
| Step | Image | How to get |
|---|---|---|
| 1 |  | As you proceed with the story, you will reach a cutscene showing mannequins. |
| 2 |  | Turn right to where the zipline is, then go to the narrow path. |
| 3 |  | At the end of the narrow path, go left and use the zipline. |
| 4 | | Follow the ledge then turn left again to see a chest containing the Mod: Extended Breach. |
100% Mass Production Array Collectible 6
Mini Cabin Buddy 1/1
AREA: Shopping District

HOW TO GET
| Step | Image | How to get |
|---|---|---|
| 1 | | As you proceed with the story, you will reach a cutscene showing mannequins. |
| 2 |  | Turn right, then use the zipline. |
| 3 | | Look up. It's at the end of "TEWAY." |
100% Mass Production Array Collectible 7
Safe Box 1/8
AREA: Shopping District

HOW TO GET
| Step | Image | How to get |
|---|---|---|
| 1 | | As you proceed with the story, you will reach a cutscene showing mannequins. |
| 2 | | Turn right, then use the zipline. |
| 3 |  | Follow the narrow path. |
| 4 |  | At the end of the path, there will be enemies. Defeat them then get the safe box. |
100% Mass Production Array Collectible 8
Safe Box 2/8
AREA: Shopping District
Note: This collectible can only be obtained after getting the Lim Eraser ability in Sector 2: Mass Production Array.

HOW TO GET
| Step | Image | How to get |
|---|---|---|
| 1 | | As you proceed with the story, you will reach a cutscene showing mannequins. |
| 2 | | Turn right, then use the zipline. |
| 3 |  | Go to the white-and-blue platforms. |
| 4 |  | On the platform, you will see an area covered in filament. Use the Lim Eraser ability to remove the blockage and get the safe box inside. |
100% Mass Production Array Collectible 9
Safe Box 3/8
AREA: Shopping District

HOW TO GET
| Step | Image | How to get |
|---|---|---|
| 1 |  | After hacking the second beacon, go inside Diana's shop. |
| 2 | | In the shop, you can find the safe box near the stairs. |
100% Mass Production Array Collectible 10
Pure Lunum 2/2
AREA: Shopping District

HOW TO GET
| Step | Image | How to get |
|---|---|---|
| 1 | | After hacking the second beacon, go inside Diana's shop. |
| 2 | | In the shop, you can find the Pure Lunum inside the chest near the stairs. |
100% Mass Production Array Collectible 11
Safe Box 4/8
AREA: Shopping District

HOW TO GET
| Step | Image | How to get |
|---|---|---|
| 1 | | After hacking the second beacon, go inside Diana's shop. |
| 2 |  | In the shop, climb the stairs to reach a room with a hacking spot. |
| 3 |  | Climb the ledges to the left instead of going through the door. |
| 4 |  | Enter the Holo-Wall and defeat the enemies inside, then get the chest. |
100% Mass Production Array Collectible 12
Safe Box 5/8
AREA: Shopping District

HOW TO GET
| Step | Image | How to get |
|---|---|---|
| 1 |  | When you're at a narrow path, you'll immediately see the safe box behind the lasers. Go to the path glowing red. |
| 2 |  | Defeat the enemy posing as a mannequin on the right side. |
| 3 |  | Climb the ledge to hack the lasers. |
| 4 | | Go back to where the safe box was. The laser is now gone. |
100% Mass Production Array Collectible 13
Read Earth Memory 1/1
AREA: Shopping District

HOW TO GET
| Step | Image | How to get |
|---|---|---|
| 1 | | In the narrow area with an enemy posing as a mannequin, go in further to see path on the left. |
| 2 |  | You will see boxes on the side. Hop over them to get the Read Earth Memory: Basketball. |
100% Mass Production Array Collectible 14
Mod 2/2
AREA: Shopping District

HOW TO GET
| Step | Image | How to get |
|---|---|---|
| 1 |  | Reach the enclosed area with enemies posed as mannequins. |
| 2 |  | After defeating them, continue on the path and you will reach the room where you can find the chest containing the mod. |
| 3 |  | Open the chest to get the Mod: Close Quarters. |
100% Mass Production Array Collectible 15
Mod 1/2
AREA: Side Alley

HOW TO GET
When you reach the blue-and-white platforms in the side alley, you can spot the chest on a corner by the fence. The chest contains the Mod: Relay Amplifier.
100% Mass Production Array Collectible 16
Mod 2/2
AREA: Side Alley

HOW TO GET
Before hacking the next beacon, go down. Defeat the enemies in the area. You can easily spot the chest that contains the Mod: Long-range Targeting.
100% Mass Production Array Collectible 17
Mini Cabin Buddy 1/1
AREA: Side Alley

HOW TO GET
| Step | Image | How to get |
|---|---|---|
| 1 |  | After hacking the beacon, jump toward the gap where you can find a zipline. |
| 2 |  | Use the zipline to go up. |
| 3 | | From here, you can spot the Mini Cabin Buddy on top of a truck. |
100% Mass Production Array Collectible 18
Safe Box 1/1
AREA: Side Alley

HOW TO GET
| Step | Image | How to get |
|---|---|---|
| 1 | | After hacking the beacon, jump toward the gap where you can find a zipline. |
| 2 | | Use the zipline to go up. |
| 3 |  | Turn toward the truck where you can find the Mini Cabin Buddy. Jump down to the platform where the safe box is. |
100% Mass Production Array Collectible 19
Read Earth Memory 1/1
AREA: Side Alley

HOW TO GET
| Step | Image | How to get |
|---|---|---|
| 1 |  | Go to the alley where you can potentially find a Sweeper Bot. Defeat the Sweeper Bot to get the trophy/achievement, You’re Not Getting Away That Easy. |
| 2 |  | Use the zipline near it to go up. You'll immediately see the Read Earth Memory: Slide. |
100% Mass Production Array Collectible 20
Pure Lunum 1/2
AREA: Business District

HOW TO GET
Open the chest near the Business District escape hatch to get the Pure Lunum.
100% Mass Production Array Collectible 21
Safe Box 1/5
AREA: Business District

HOW TO GET
| Step | Image | How to get |
|---|---|---|
| 1 |  | Starting from the escape hatch room, head toward outside where you can find filament masses blocking the way. |
| 2 |  | Jump down to the right to get the safe box. |
100% Mass Production Array Collectible 22
Mod 1/1
AREA: Business District

HOW TO GET
| Step | Image | How to get |
|---|---|---|
| 1 | | Starting from the escape hatch room, head toward outside where you can find filament masses blocking the way. |
| 2 | | Jump down. |
| 3 |  | In this area, you will find a Red Zone. Defeat the enemies and the Mod: Pocket Refinery will be your reward. |
100% Mass Production Array Collectible 23
Pure Lunum 2/2
AREA: Business District

HOW TO GET
| Step | Image | How to get |
|---|---|---|
| 1 | | Starting from the escape hatch room, head toward outside where you can find filament masses blocking the way. |
| 2 | | Jump down. |
| 3 | | In this area, you will find a Red Zone. Defeat the enemies and the Pure Lunum will be your reward. |
100% Mass Production Array Collectible 24
Safe Box 3/5 (2 Safe Boxes)
AREA: Business District
Note: This collectible can only be obtained after getting the Cleanse ability in Sector 6: Central Port.

HOW TO GET
| Step | Image | How to get |
|---|---|---|
| 1 | | Starting from the escape hatch room, head toward outside where you can find filament masses blocking the way. |
| 2 | | Jump down. |
| 3 | | In this area, you will find a Red Zone. |
| 4 |  | Continue on the path to find a zipline covered in filament masses. Remove them using the Lim Eraser ability, and then use the zipline. |
| 5 |  | Use the Cleanse ability to remove the dead filament. |
100% Mass Production Array Collectible 25
Safe Box 4/5
AREA: Business District

HOW TO GET
In the room opposite of the Red Zone, you will find the safe box.
100% Mass Production Array Collectible 26
Cartridge Holder 1/1
AREA: Business District

HOW TO GET
In the room opposite the Red Zone where you can find the safe box, use the zipline to go up and take the cartridge holder.
100% Mass Production Array Collectible 27
Safe Box 5/5
AREA: Business District
Note: This collectible can only be obtained after getting the Lim Eraser ability in Sector 2: Mass Production Array.

HOW TO GET
| Step | Image | How to get |
|---|---|---|
| 1 | | Starting from the escape hatch room, head toward outside where you can find filament masses blocking the way. |
| 2 |  | Clear the filament masses using the Lim Eraser ability. Go down the elevator. Follow the path. It will lead you to an open area with platforms. |
| 3 |  | Hack and jump on platforms. Once you step on the second red bus, you'll spot the safe box on the other side. |
100% Mass Production Array Collectible 28
Read Earth Memory 1/1
AREA: Business District

HOW TO GET
| Step | Image | How to get |
|---|---|---|
| 1 |  | When you reach the platforming section where you found a safe box, stand on the extended platform just before the safe box. There's a hacking spot below. |
| 2 |  | After hacking, turn and jump on the red bus. |
| 3 |  | You will then see the platforms forming like stairs. Head to said area. |
| 4 |  | Follow the path until you reach an opening to the fence. There is another hacking spot. |
| 5 |  | After hacking, head to the next stair-like platforms and reach the top. |
| 6 |  | In this area, you will be able to see the Read Earth Memory: Skateboard. |
| 7 |  | Remove the filament masses and jump over there. In this way, you can see the hacking spot below. |
| 8 |  | After hacking, platforms will be extended that will lead you to the Read Earth Memory. |
100% Mass Production Array Collectible 29
Safe Box 1/3
AREA: Lim Recycling Facility

HOW TO GET

Upon entering the Lim Facility Recycling Facility, you can find a Holo-Wall across the open room. You can find the safe box inside.
100% Mass Production Array Collectible 30
Read Earth Memory 1/1
AREA: Lim Recycling Facility

HOW TO GET
Upon reaching the Lim Recycling Facility, follow the path until you see an open room. You can find the Read Earth Memory: CRT TV inside.
100% Mass Production Array Collectible 31
Mini Cabin Buddy 1/1
AREA: Lim Recycling Facility

HOW TO GET
| Step | Image | How to get |
|---|---|---|
| 1 | | Jump down from the circular platform. |
| 2 |  | Defeat the enemy. |
| 3 | | In the next room, you can find the escape hatch and the Mini Cabin Buddy. |
100% Mass Production Array Collectible 32
Safe Box 2/3
AREA: Lim Recycling Facility

HOW TO GET

Enter the room where you can find the escape hatch and the Mini Cabin Buddy. Climb where the Mini Cabin Buddy is to reach the pipes.
100% Mass Production Array Collectible 33
Safe Box 3/3
AREA: Lim Recycling Facility

HOW TO GET
| Step | Image | How to get |
|---|---|---|
| 1 |  | In the room where you can find the Mini Cabin Buddy and the escape hatch, go to the next room. |
| 2 |  | Defeat the enemies then follow the path until you reach the room with lasers. |
| 3 | | You can see the safe box on the ledge. |
| 4 |  | Go down to hack the lasers. |