


Subterfuge at the Abandoned Shrine Guide

Subterfuge at the Abandoned Shrine Quest Summary
Period: Heian - 1190 CE
To the east of Kyoto, Yasaka Shrine and the Taira Clan’s stronghold at Rokuhara have fallen into ruin; no trace of their former glory remains. I will push forward with Yoshitsune to purify the barrier at Yasaka Shrine.
Subterfuge at the Abandoned Shrine Walkthrough
[1] Make your way toward Yasaka Shrine.
The quest begins automatically when you reach Yasaka Shrine: Nishiro Gate.
Minamoto no Yoshitsune will be waiting by the shrine and will accompany you during the mission, helping you fight enemies.

[2] Search for Collectibles.
After talking to Yoshitsune, start exploring! Keep your eyes peeled for any Valuables.
| Point of Interest | Image | Details |
|---|---|---|
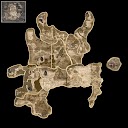
| Kodama |  | Found on the rooftop. |
Heading left from the Shrine, climb the stairs and prepare to fight enemies along the way.
Pass through the gate and turn right. Once you reach the top, proceed past the wooden platforms to reach the roof.
| Point of Interest | Image | Details |
|---|---|---|
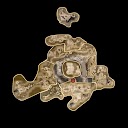
| Secret Skills Text: Streamflow |  | On the other side, head inside a small building to find this Chest and reveal a Mujina. Either play along with its gesture or defeat the Yokai to get this item. |
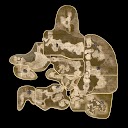
| Samurai's Text |  | Continue past the wreckage and turn left. After clearing the enemies, pass by the stairs and turn left at the corner building to head east. There will be a building to your left that has a chest containing this Collectible. |
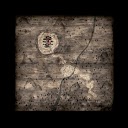
| Secret Skills Text: Perseverance |  | Pass through the gate and enter the building on your left to find a large Chest. |
| Ninja's Text |  | Keep moving forward and climb the ladder inside the tower. Go to the 3rd floor and loot the nearby Chest for a Ninja's Text. |
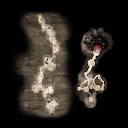
| Ninja's Locks |  | Then, head to the terrace and search the Corpse for the Ninja's Locks. |
When you're done looking for Collectibles, drop down through the broken wall and onto the roof below.
Turn left, defeat the enemies in the area, and open the gate on the far side to unlock a shortcut.
[3] Defeat Kajiwara Kagetoki.
Once you are ready, pass through the open gate to trigger the cutscene and begin the battle against Kajiwara Kagetoki.

To win this Boss Fight, keep the following Combat Tips in mind:
・Kajiwara Kagetoki uses dual hatchets as his weapon and has the unique ability of summoning Yokai.
・The fight is straightforward, just watch out for his summons and skill usage.
・Minamoto no Yoshitsune will help you out in this battle, so play off of his tempo and work together to gain the advantage.
・You can use ranged skills and attacks while Yoshitsune keeps Kajiwara Kagetoki busy.
| Move | Showcase | Details |
|---|---|---|
| Axe Throw |  | Along with Kagetoki's close-range combos with his hatchets, be careful when he throws them at you. They will have a boomerang effect. |
| Charge Attack |  | The boss can also quickly charge at you to perform a heavy blow. You can counter this with Burst Break. |
| Purple Skill |  | From time to time, you'll see Kagetoki using a seal while a purple glow surrounds him. Stay away from this skill, as it can knock you back if you're too close. |
| Ningyo Summon |  | He will summon a mermaid-like Yokai that fires a single water blade at you from a distance. |
| Wasp Summon |  | Two giant wasps will appear and chase you to land a sting that can inflict Poison. |
| Yamabiko Summon |  | This is a loud mountain Yokai that will shoot multiple orbs. Dash to the other side to avoid them. |
| Werewolf Summon |  | A Yokai similar to a werewolf will leap and charge directly at you. |
| Mezuki Summon |  | At the later stages, Kagetoki can also summon a Mezuki. It's a strong and horned Yokai holding a cleaver that will also lunge at you. |
[4] Purify the Rokuhara Barrier.
After defeating Kajiwara Kagetoki, cleanse the barrier to officially end this Quest!

If you have finished purifying all three barriers around Kyoto, proceed to the second part of "Heian Befouled" to unlock the next Mission, "A Cause Too Great".
Quest Rewards:
・Ninja's Locks
・Dual Bloodstained Cleavers
・Handbook: Roundabout
・ Shinto Priest's Hakama