


A Fiery Invasion - Part 2 Guide

Main Mission
A Fiery Invasion - Part 2 Quest Summary
Period: Warring States - 1572 CE
After defeating Yamagata Masakage, the gargantuan yokai appeared once more in the skies, and the Crucible spread forth as though pouring out below it, swallowing the battlefield.
Naotora claims that this is a Death Veil, or Soranaki—a creature that summons the Crucible.
A Fiery Invasion - Part 2 Walkthrough
[1] Enter the Crucible.

As a new Crucible appears during "A Fiery Invasion - Part 1", you witness your grandfather being trapped inside. Go and help him!
Your starting point is the battlefield where you fought Yamagata Masakage (Yokai Form). Don't forget to claim the loot he dropped before moving on.

Talk to Naotora and she’ll explain that the Yokai behind all of this is a Death Veil, or Soranaki.
Make your preparations, then head to the entrance of the Crucible.

[2] Search for Collectibles.
Start exploring the Crucible! Here are the key locations you will encounter:
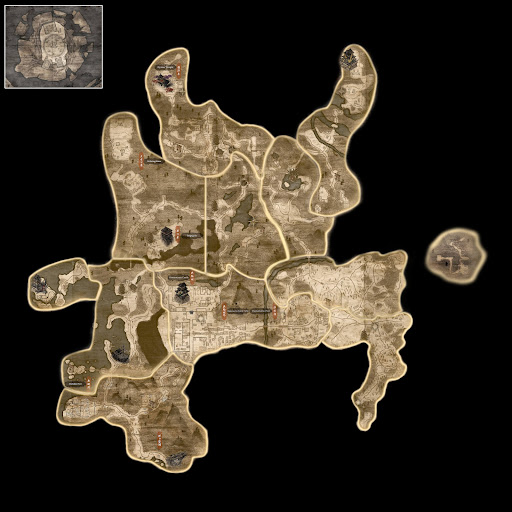
AREA 1 - Takeda Camp
| Point of Interest | Image | Map |
|---|---|---|
| Takeda Camp Bodhisattva Statue |  |  |
| Nakane Masateru |  Talk to this NPC to get a Power Pill. |  Found before reaching the next Bodhisattva Statue. |
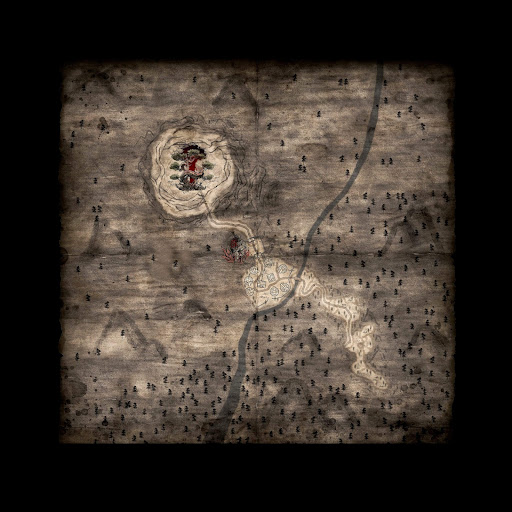
AREA 2 - Hoda Slope
| Point of Interest | Image | Map |
|---|---|---|
| Hoda Slope Bodhisattva Statue |  |  |
| Honda Tadakatsu |  One of the NPCs you can encounter. |  Found next to the Hoda Slope Statue. |
| Sakakibara Yasumasa |  Assist this Soldier to get a Daion-Jin's Sake. |  Located before reaching the Hot Spring. |
| Hot Spring |  |  |
After relaxing at the Hot Spring, head back out to find the following Collectibles:
| Collectible | Image | Map |
|---|---|---|
| Ninja's Locks |  |  |
| Secret Skills Text: Resilient Arts |  |  |
| Secret Skills Text: Fatal Fists |  |  |
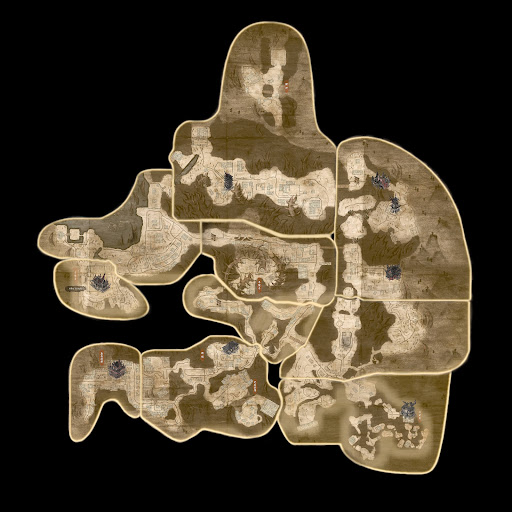
AREA 3 - Nearaimatsu
| Point of Interest | Image | Map |
|---|---|---|
| Nearaimatsu Bodhisattva Statue |  |  |
| Kosaka Masanobu |  A Formidable Enemy that you can defeat. |  Inside a tent near the Statue. |
| Sakai Tadatsugu |  Assist this Soldier to get a Healing Pill. | He's seen fighting Kosaka Masanobu. |
The two remaining Collectibles are found near the Bodhisattva Statue:
| Collectible | Image | Map |
|---|---|---|
| Handbook: Reverse Impact |  Reward for defeating Kosaka Masanobu. | Automatically obtained after the battle. |
| Secret Skills Text: Weight Bearer |  Can be looted from a Corpse. |  Drop down through the gap on the bridge. |
[3] Defeat Takeda Shingen.
When you’re ready to leave Nearaimatsu, follow the white marker on your Map to face Takeda Shingen.

Before facing the main boss of this Mission, here are some quick Combat Tips to keep in mind:
・Takeda Shingen uses a large spear that may overwhelm you at first, but once you get the hang of his attack patterns, you can land damage from behind.
・After you chip away a good amount of his health, he will start to summon his Guardian Spirit. Keep a close watch for this and dodge immediately.
・You can equip items to increase your resistance, but remember that this boss switches between his Fire and Wind skills.
Listed below are the moves that Takeda Shingen can perform during the battle:
| Move | Showcase | Details |
|---|---|---|
| Spear Combo |  | During the early stages of the fight, dodge his spear swings to avoid taking continuous damage from his combos. Also watch for any red aura from the boss; it's your signal to execute a Burst Break. |
| Jump Attack |  | When Shingen uses his jump attacks, it creates a perfect opening to dash behind him and deal some damage. |
| Impale | When Dodged: Move Animation:  | Be careful of getting impaled by his spear. Use the yellow and gray glow as your signal to dodge! |
| Block |  | While you're on the offensive, Shingen can use this skill to block any incoming attack. Wait until it is no longer active before striking again. |
| Wind/Fire Skills |  | Later in the fight, Takeda Shingen will raise his spear and infuse it with Wind or Fire power. Stay alert for his enhanced abilities. The color of his weapon will signal which element he is about to use. |
| Guardian Summon |  | Shingen's Guardian Spirit can either launch fireballs in your direction or lunge at you. Both of these attacks can deal Fire and Wind damage. |
[4] Cleanse the Mikatagahara Crucible.
The fierce fight with Takeda Shingen is over!

A cutscene will play where he escapes, but your goal for now is to break the Crucible.

After breaking the Crucible, Tokugawa Ieyasu arrives! With the danger resolved, your next task is to continue with "The Battle of Mikatagahara - Part 2".