Gleaming Abyss Guide

Lost Chapter
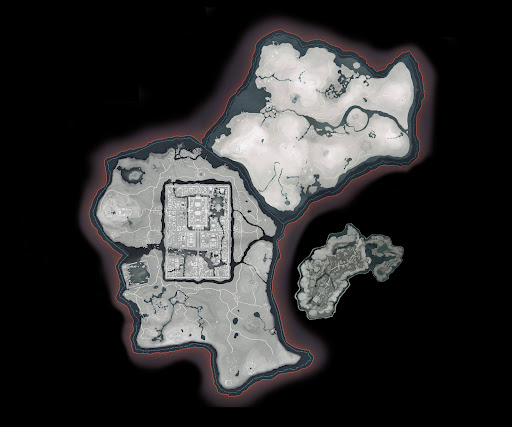
Witherwilds
Gleaming Abyss Quest Summary
There are secrets to be found in this cave. Just like this...mysterious singing?
Gleaming Abyss Walkthrough
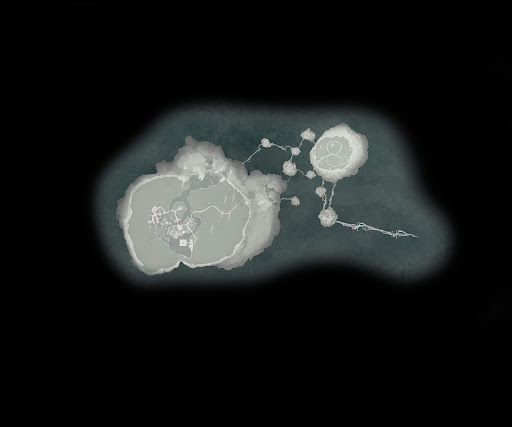
[1] Press Deeper into the Cave.
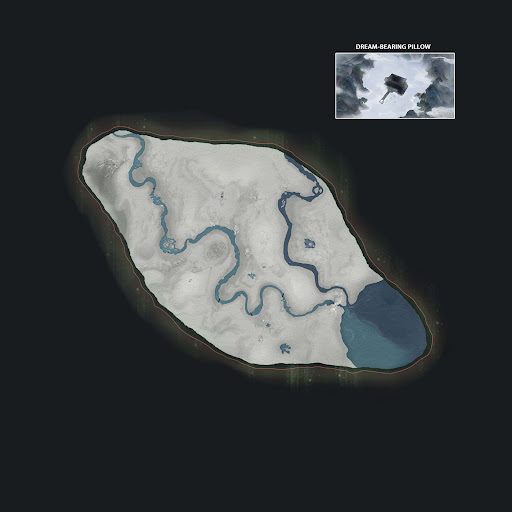
・Upon entering the cave, there is a Boundary Stone that you can activate to fast travel to the cave. Keep venturing forwards in the cave. The quest marker will lead you downwards, but there will also be enemies along the path, so take care of them. As you keep exploring, your character will note that the water is posioned, so stay away from it!
[2] Trace the singing to its source - The Stone Coffin
・First, bask in how beautiful this game can be. After that, activate the Boundary Stone for another fast travel point. Now follow the quest marker to the winding path, but you will be blocked from continuing.
[3] Quell the Stone Coffin's Wrath
- Deer Shadow| Water's Edge
- Deer Shadow| Drum's Top
- Deer Shadow| Vine's Depths
・To get past the barrier, you will need to interact with 3 Dream Echoes in the area. Select "Sense Dream echo" when near them to interact.
・The closest one is Water's Edge to your left, near a pier.
・Vine's Depths is harder to reach. Find the opening with the glowing blue flowers. They are behind two Dream Echoes. You can approach them now, but we will cover what to do with them later. Crouch down and walk through glowing leaves path. It will be hard to see without good Illumination skill, so be sure to collect fireflies. You can also use fire arrows to light up the way (just don't fire them!). Head towards the spot where the lanterns are and continue forward.
・After ** Vine's Depths**, take the path curving upwards to exit the area. Drop down and approach the two Dream Echoes from earlier. A cutscene will play that will zoom in on the spot they are looking at; there's vines there. Shoot a fire arrow at the vines to burn it and that will light up a pyre. Use wind sense if it is hard for you to spot the vines. A path will rise from the waters, take it and you will be led to Drum's Top.
[4] Investigate the secrets within the Stone Coffin
・The barrier is gone now, so you can walk thorugh the winding path. There, interact with the Stone Coffin for a cutscene.
[5] Survey What Lies Ahead
・After being dragged to what is likely the Chinese Underworld, you wil be in an area with a Hero's Tomb to your left. Drop to the ground below you and get ready, you will be fighting waves of enemies before continuing.
[6] Overcome the Peril
・ Fight the enemies as you normally do, but still be alert! In the final wave, there is a much larger enemy to be defeated.
[7] Find a way out
・ Now you will need to look for a way out. Interact with the statue with the angry face and four arms to collect Sun Buqi's Notes. Next, head to the stairs that go up, the flight adorned with unlit ceremonial lanterns. Climb the stairs and head to the spot with the written papers sprawled on the floor. Interact with the skull by selecting "Purify." After taking the skull, climb the other set of stairs nearby to approach the mummified corpse. On the corpse is the Human Cocoon's Note and the Stone Gate Key.
・Now return to ground level. To the right of the statue is the Stone Gate and nearby is a another statue that requires the Stone Gate Key you just picked up. When the gate opens, descend further into the cavern.
・You will have to take care of more enemies along the way,but there is a Hero's Tomb to heal in. Further down in, there is a Boundary Stone for you to activate. Pass the Boundary Stone there is a wall you can interact with to enter Build Mode. Right now, you only have one of the three pieces you need, so let's get the rest.
・Return to the path between the Hero's Tomb and the Boundary Stone, you should be able to see a chest. There is a wooden board stuck on the wall by some vines, use your Wind Sense to see it. Use a fire arrow to burn it down, allowing you to proceed downward. Keep walking and you should see another Shadow Deer and Dream Echo. Interact with the Dream Echo for an Story Fragment, and interact with the twigs beneath the deer to purify it.
・Take the path behind the Dream Echo and you will find another deer behind a set of twigs for you to purify. Do so and look at the wooden shelf behind you for another of Sun Buqi's Notes. Jump down to the path to the Boundary Stone.
・Interact with the wall again to re-enter BUild Mode and place the two twigs. The gate will then rise.
・[8] Approach and Inspect
・Apporach the empty room ahead for another cutscene, the Shadow Deer will let you ride it to another area where there is a large man picking away petals from a flower. It's The Void King, another boss. Don't worry, you don't have to fight him yet. Heal at the Hero's Tomb and approach him when you're ready.
・[9] Defeat The Void King
・Self-explanatory. He will have attacks that require multiple deflections, and he has ranged attacks do. Proceed with caution.
・[10] Head to the Mist Gate
・Follow the quest marker into the gate. In the next area there is Hero's Tomb to heal at.[11] Uncover the Final Story
・Head to the blue tree in the midde and search the grave for a prompt saying "Biography of Bai Wu Part I" and interact with the Dream Echo. This will complete the Gleaming Abyss Story, but not the quest! When you're done there, head back and climb the stairs to your right, you will return to the area you were at before you were dragged down. You will see two Dream Echoes and a white glowing statue. Interact with the statue to raise a stone path for you to walk across. Loot the box and the quest is complete.
Gleaming Abyss Rewards
・Echo Jade x 55
・Medicinal Tale
・Oscillating Jade x 5
・Internal Art: Bitter Seasons
・Qinghe Exploration Points x 105
・Experience x 35000
・Zhou Coins x 5000